Inside: Step by step instructions for a DIY Paper envelope and how to make it cute with washi tape!
Propped up on my keyboard was a pink envelope, edged in flowered washi tape and covered in hand-drawn hearts. This was no ordinary love note. This was a one-of-kind special from my four-year-old.
My daughter LOVES to draw me little notes with stick figures and backward letters and deliver them to me in a, sometimes slightly crooked, envelope.
She makes those envelopes herself, out of plain old copy paper or construction paper. I taught her how to make quick and easy envelopes, and I can show you too. If a four-year-old can do it, so can you!
What You’ll Need:
- A piece of paper. I will use an 8.5″ x 11″ paper in the demo below. But you can experiment with other sizes!
- Scissors
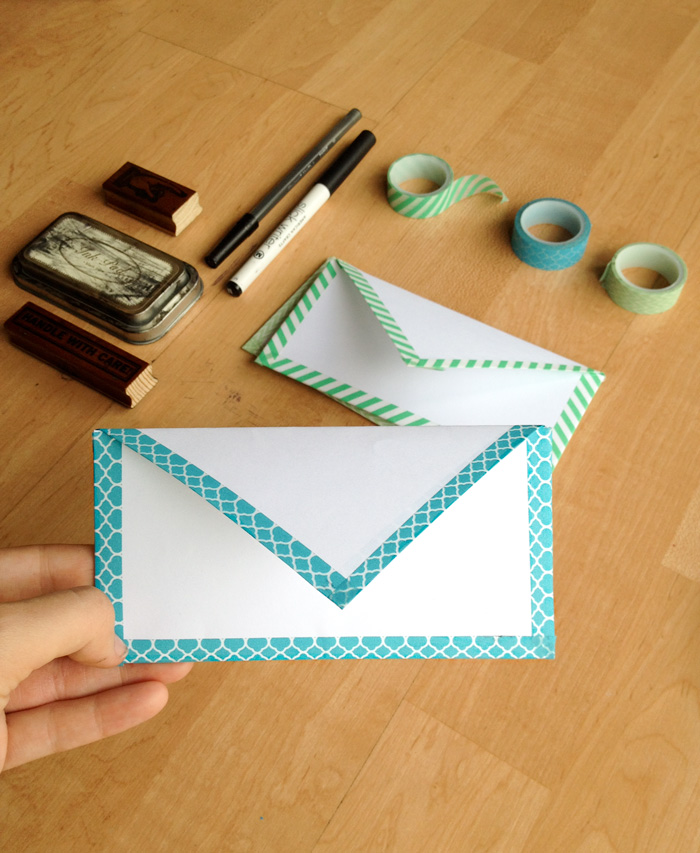
- Tape – I used Washi Tape. It’s something we always have on hand and it adds personality to your handmade envelope. We’ve collected Washi Tape from all sorts of stores. Amazon has some fun
variety packs!
How To Fold A Paper Envelope:
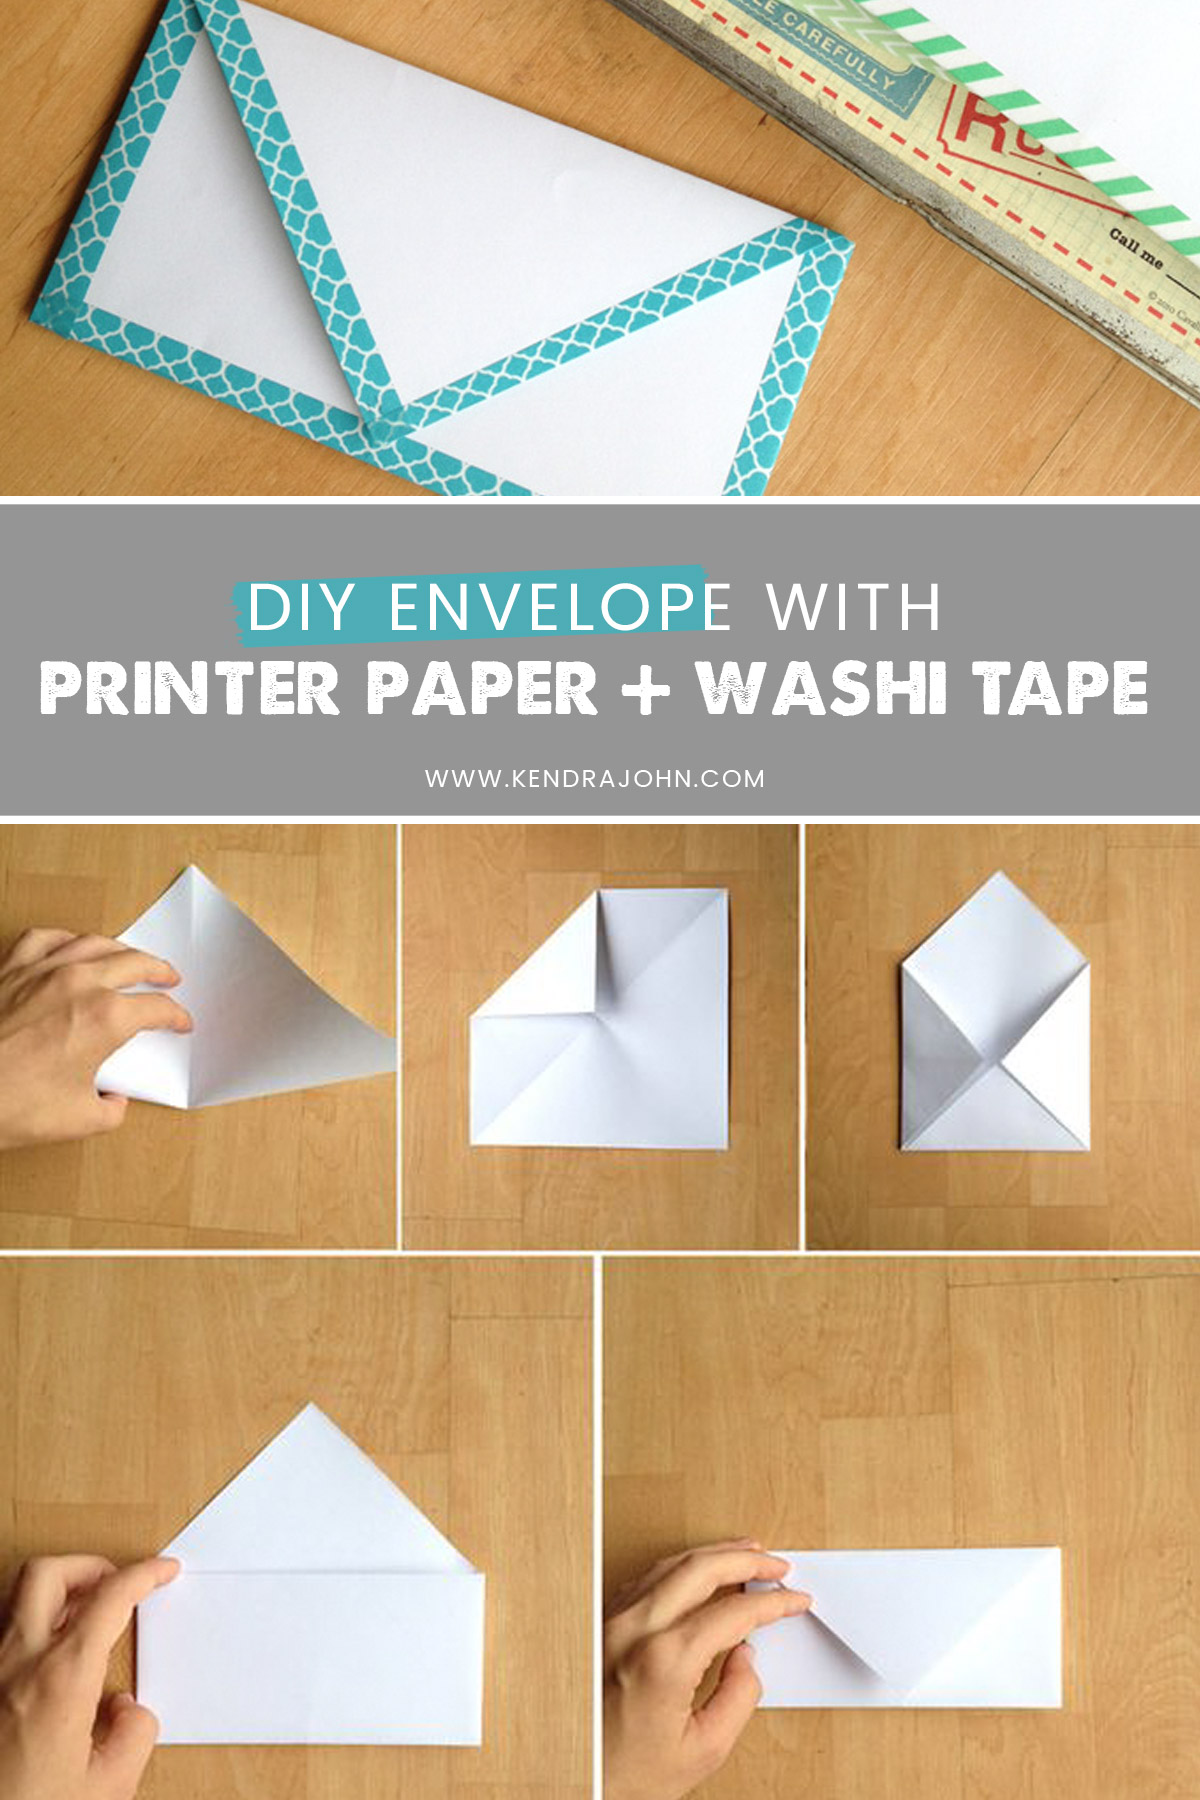
1. Fold your bottom right corner up until the whole bottom side of the paper is flush with the left side.
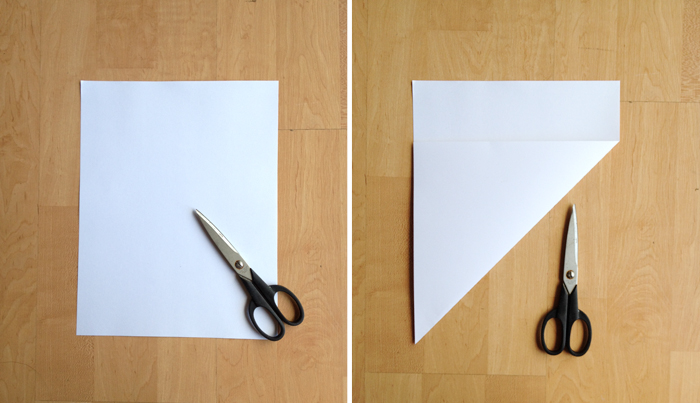
2. Trim off the top rectangle piece and open up your paper.
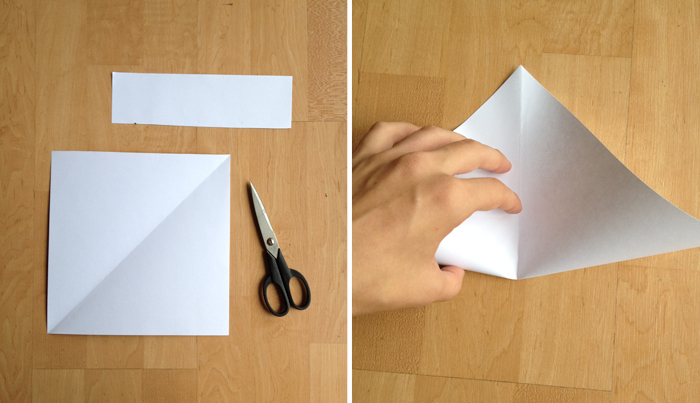
3. Take the bottom left-hand corner and bring it to the top right-hand corner making a triangle. Don’t completely crease the paper! Just make a small crease at the bottom of the triangle. You will use the small crease mark as a guide instead of making a big ugly crease all the way across.
4. Orient your paper so the corner that DOES NOT have a crease is at the top. Now fold the other 3 corners to the center.
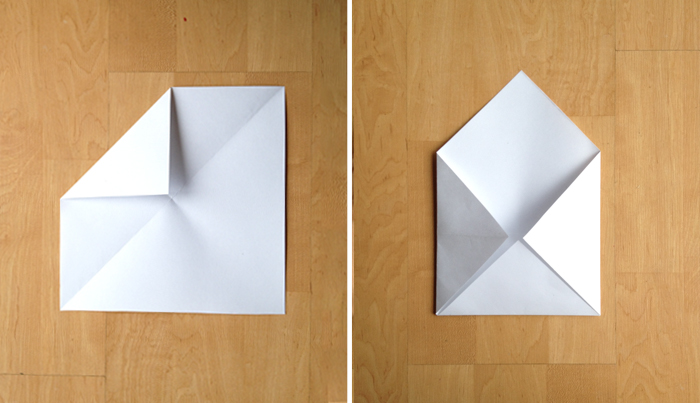
5. Fold the bottom half of the envelope up in half. Fold your top flap down.
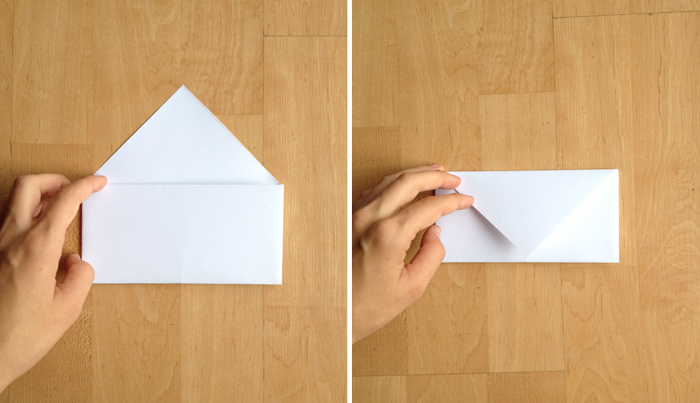
Ta – da! Now you have an envelope! Easy right?
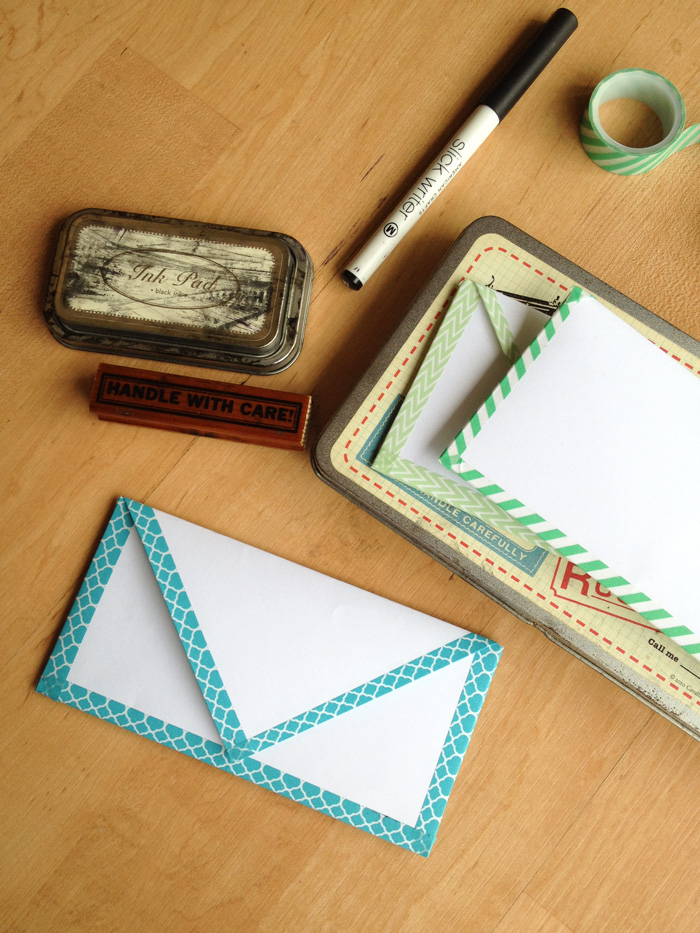
Next cut washi tape stripes the same size as the sides of the envelope.
Place the washi strips half on the envelope edges, then fold the other half around to the other side.
This makes a nice edge while also holding the envelope together.
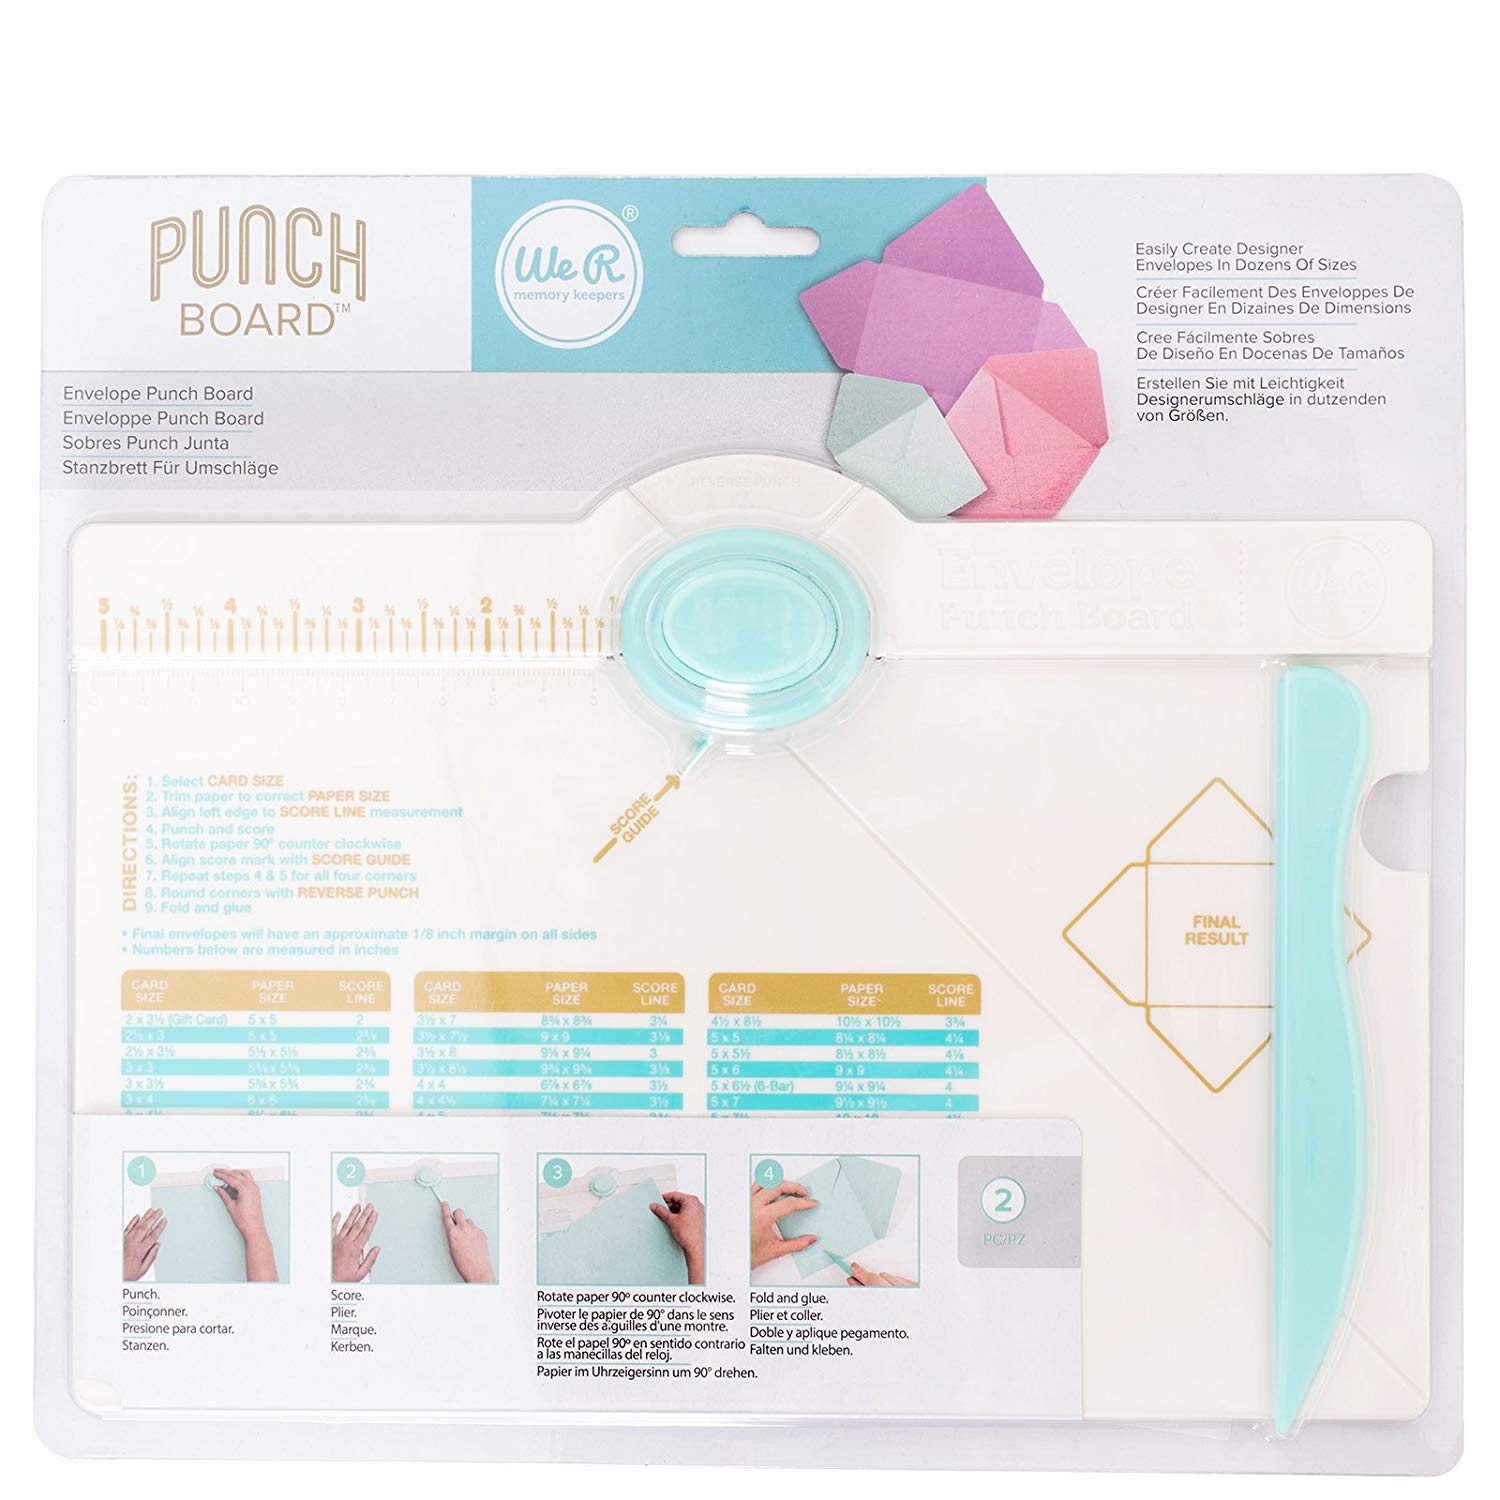
Another Option for Making Envelopes
You will love this Envelope Punch Board from Amazon! This makes folding envelopes of all sizes incredibly easy! And, you don’t have to cut anything!
- Make an envelope in mere seconds – with a few scores, folds and punches create designer envelopes from cardstock, vellum or patterned paper in seconds
- No cutting required – just punch and score. Easy!!

What are you waiting for? Go make a paper envelope for that birthday card or make a batch of love notes for your family! You don’t want to be outdone by a 4-year-old, do you?

Thank you for this tutorial. Making an envelope looks pretty easy and I love the washi tape.
Kathi
Your welcome! It is super easy and fun! :)
These are adorable. I’m always looking for fancy envelopes, and these are so easy!
Oh my goodness! SUCH a cute idea! I love it!
Thanks! :)
Too darn cute. I love that you can make these at home and to reflect your personal taste instead of buying the old boring envelopes!
I’d love it if you could hop on over to Tell it To Me Tuesday and link up your posts with us!
http://www.sweetsillysara.com/2014/04/tell-me-about-it-tuesday_21.html
Thanks :)
Great idea and so cute!
Thanks Steph! :)
That’s so cute….I found a cute gift idea with envelopes.I definitely cannot go hunting for those boring and serious-looking envelopes {plus they’re costly too nowadays!!!} ….And I’ll never ever even think of stealing my parent’s envelopes….So, I found your idea through Pinterest….Thanks very much Kendra!!!
I love this. Thanks for sharing. The possibilities are endless…
This was just so simple that even I could do it. I grabbed a piece of paper, just to do it right then, and within 5 minutes I had an envelope. It was GREAT! Perfect PIN for my Swap-Bot friends to use too. Thanks! I’m so excited to have another easy envelope to create.
This is adorbs!! My 12 year old daughter is into letter writing and she will LOVE this! She never has the right sized envelope! I need to stock an entire stationery store around here, lol.
Thanks Ksenia!!! :)
Thank you! That was the easiest envelope to make!
i love it